Note: This is an old post from 2016, that was recovered from the database of my old website.
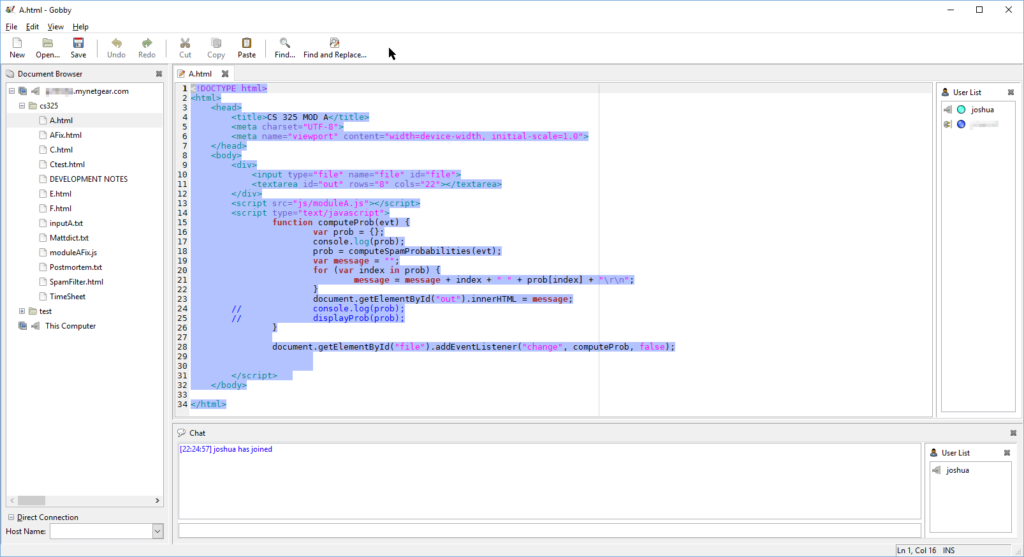
Overview: Gobby is a cross-platform collaborative text editor that enables Google Docs style editing. Unlike Etherpad, Gobby is more focused toward editing code with its support for syntax highlighting as demonstrated below.

I have used this program for multiple group projects and everyone found it very beneficial as it allowed us all to work on the same file(s) at once even when we were not in the same room. The built-in chat box enabled us to easily communicate while we worked on the project remotely. As an added bonus, the server used by Gobby, Infinoted, can be used with other text editors such as gedit. Hosting the server does not require a very powerful machine as a simple Raspberry PI 2 will suffice. You can download the Gobby client from the project’s website.
Installation:
Note: items marked in red indicate they may vary based on how you decide to install this service. Whenever you want to install something on a Debain based Linux distribution, you want to, first of all, make sure your package manager, apt, it up to date. To do so, run the following command. sudo apt-get update After you update your package manager, it is always a good idea to make sure all your packages are up to date. sudo apt-get upgrade Now it is safe to install Infinoted using the package manager. sudo apt-get install infinoted Once you have finished installing Infinoted using the package manager, you need to configure it. For security reasons, it is recommended to run a service with a specific user and group. You can choose any username and / or group you want, but it is recommended to chose something that will be easy to recognize for example gobby or infinoted. The following instructions use gobby for both the user and the group. The following command will create a new system user and group named gobby with no login access and home directory:
/home/services/gobby sudo adduser --system --gecos "Infinoted Service" --disabled-password --group --home /home/services/gobby gobby
If you prefer, you could use /var/lib/gobby as the home directory. You should now set the directory permissions for the gobby home directory. You should recursively set the home directory and all other following directories to 770. Setting the permission level to 770 allows only the owner and those in the group to read, write and execute files.
sudo chmod -R 770 /home/services/gobby
The following command should be optional but is very useful if encounter ownership problems in the gobby home directory. It recursively sets both the directory owner and group to gobby. Both the directory owner and group should have been set when you created the gobby user.
sudo chown -R gobby:gobby /home/services/gobby
Now you need to add the users you wish to be easily able to access the files edited on the server to the gobby group. To do so, use the following command as a template by replacing “username” with the desired username without quotes.
sudo adduser "username" gobby
Next, you need to add the keys, data and export directories under the gobby home directory. If you set the directory permissions correctly you should not have to use sudo to create these directories.
mkdir /home/services/gobby/keys
mkdir /home/services/gobby/data
mkdir /home/services/gobby/export
Now it is time to create the Infinoted configuration file, infinoted.conf, in which you specify your desired settings. First, create the file using touch.
sudo touch /etc/xdg/infinoted.conf
Note: the configuration must be located in either /etc/xdg/ or $HOME/.config/ as infinoted looks for the configuration file in the following order.
/etc/xdg/infinoted.conf$HOME/.config/infinoted.conf
You can use Nano, or your favorite Linux text editor to edit infinoted.conf. sudo nano /etc/xdg/infinoted.conf You should add the following to the file.
Note: you should set your own password, so don’t just blindly copy this.
[infinoted]

security-policy=require-tls

key-file=/home/services/gobby/keys/infinoted-key.pem

certificate-file=/home/services/gobby/keys/infinoted-cert.pem

password=strong_password

autosave-interval=5

root-directory=/home/services/gobby/data

sync-directory=/home/services/gobby/export

sync-interval=25
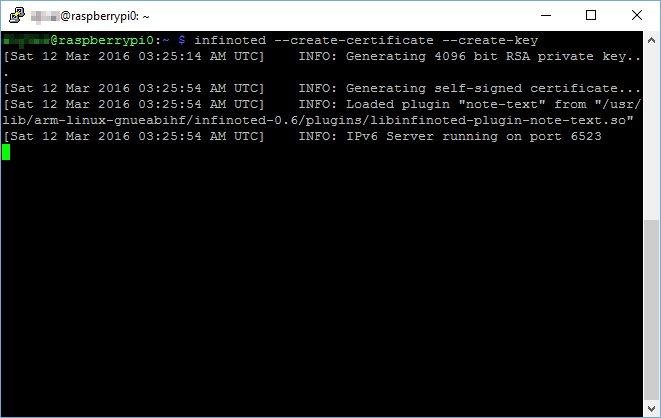
After you save the configuration file, you should set its permissions. This step should be optional, but it is recommended if you encounter permission errors. sudo chown gobby:gobby /etc/xdg/infinoted.conf sudo chmod 550 /etc/xdg/infinoted.conf Now you can generate the certificate and key files and test Infinoted. infinoted --create-certificate --create-key If everything worked correctly, you should see this:

Once you see the output above, close Infinoted with crtl-c. To run Infinoted on startup, need to create a systemd startup script. Note: this only applies if you are running Debian version 8 or Ubuntu version 15.04 or later. If you are using an earlier version, you will have to improvise with Upstart or init (obsolete). Create a file called /etc/systemd/system/infinoted.service which should contain the following:
[Unit]

Description=Infinoted Daemon

After=network-online.target

[Service]

Type=simple

User=gobby

Group=gobby

UMask=007 ExecStart=/usr/bin/infinoted &

Restart=on-failure # Configures the time to wait before service is stopped forcefully.

TimeoutStopSec=300

[Install] WantedBy=multi-user.target
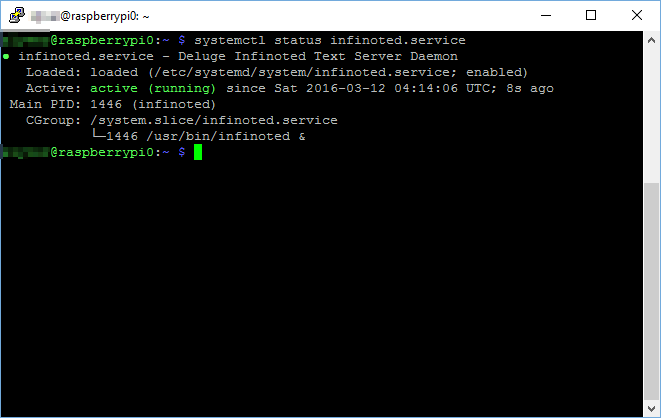
Now start the service using systemctl start infinoted and to verify the service is running, use systemctl status infinoted. If Infinoted is running correctly you should see this:

Finally, enable Infinoted to startup on boot. systemctl enable infinoted
References: Gobby project website
Leave a Reply